Distribution of Newsletters

Newsletters are an excellent opportunity to notify your customers about new developments, create incentives and to make clear: “There is always something happening here”! Inform recipients of new products and services; send coupon codes; announce special offers – there are lots of reasons to utilize your newsletter as your shop’s or your website’s mouthpiece.
Creating Newsletters in ePages Shops and Websites
To create a newsletter, go to Marketing -> Newsletter in your shop or website administration. Here, you should start by specifying a newsletter campaign in order to organize your newsletters by topic. Campaigns might be called “Sale” or “Quarterly Newsletter”. Enter an ID and a Name into the empty fields. Your next step is to assign newsletters to your new campaign. Click on the ID; then enter an ID and a name for your newsletter. Afterwards, click on the newsletter’s ID again.
In the entry interface under the General tab, you can specify all the details of your newsletter. Select one of our templates with sample contents, or create a newsletter of your own. Via the Edit Text button, you can arrange the contents of your newsletter – without HTML, if you wish.
If you want to address your customers by name, insert placeholders into your text. You will find the available placeholders at the right margin. Use the code precisely as you see it. Ensure that you have names for all addressees.
If you choose to send HTML newsletters, you will be able to incorporate images and adapt the layout. Keep in mind, however, that not all e-mail users elect to receive HTML e-mails, which are also discarded as spam by some e-mail providers.
Integrating Coupons
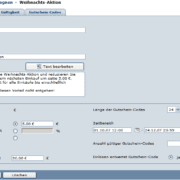
You can also send coupons via newsletter. At the bottom right in edit mode, there is a drop-down menu which allows you to select one of your coupon campaigns. Click on the Add coupon template link underneath the text window to add the code for the coupon into the text. You can place the code wherever you wish in the newsletter.
If you do not know how to create coupons, please do read our article “Win and retain customers with coupons”.
Integrating Products
Add products by means of the Tray (left margin). Mark the appropriate products in your product administration’s overview; then select the Add to tray command. The products are cached in the Tray and thus become available, for example, for the newsletter. In the newsletter’s edit mode, you will find the Add products and categories from the tray command underneath the text window. This command generates a code which appears in the text window. <!– Product Snippet (…):start–> and <!– Product Snippet (…):end–> constitute the beginning and end of a product code.
Create Address List
You can specify the people who will get your newsletter at the corresponding newsletter campaign under the Addressees tab. You have the following possibilities at your disposal:
- Direct entry of a customer name and an e-mail address. This option is suitable for addressees who are not registered customers.
- Direct entry of a customer number
- Entry of all customers within a customer group (specifiable in the Customers area)
- Add from the Tray (customers can be added to the tray in the same manner as products)
- Import of addressees: In the case of a relatively large group of recipients not limited to customers, it is especially suitable to import data from a text file. To do so, click on Import address data. You must observe and do the following:
- Add the addressees and their e-mail addresses to a text file (e.g. .txt) in accordance with the template on the right.
- ”E-mail” and “name” as column headings must be imported as is.
- All recipients must be listed one below the other (no separation by means of commas or semicolons).
- E-mail address and name must be separated by a semicolon or by a comma.
- Do not include the same addressee twice.
- Upload the file and click on Import.
Everybody who did indeed receive your newsletter will appear under the Recipients tab in your newsletter’s edit area. This allows you to verify if any address data are perhaps out of date.
Subscribing to Newsletter
Under Design -> Styles -> Navigation (ePages 5)/ Design -> My Styles -> Advanced design (ePages 6) select a navigation area in your shop or your website within which you want a small form for subscribing to your newsletter to appear. Then click on Add navigation elements (ePages 5)/ Insert page element (ePages 6) and mark the Newsletter sign-in checkbox. Visitors to your shop or your website can thus easily register to receive your newsletter.
Lorem ipsum dolor sit amet, consetetur sadipscing elitr, sed diam nonumy eirmod tempor invidunt ut labore et dolore magna aliquyam erat, sed diam voluptua.


Leave a Reply
Want to join the discussion?Feel free to contribute!