Fishing in the social network – How you can sell on Facebook using ePages
 With over 600 million registered users, Facebook is by far the largest social network in the world. On average, Facebook users spend over three hours a day on the platform. Measured by visitor times, the network from Palo Alto California far outranks Internet top dog Google. All this makes Facebook one of the largest channels through which online merchants can generate customers. We’ve taken all of this into account, and included a Facebook integration to ePages in version 6.11. The ePages blog explains which level of integration is possible.
Your ePages shop offers you two ways to link your shop to Facebook. Both methods are administered via the "Marketing/Social Web" menu.
Facebook "Like" buttons
The Facebook "Like" button is a small but powerful enhancement to your shop. You can even utilise it if you don’t have a Facebook page or a fan page. All you have to do, is activate the function in the "Social Web" menu and decide on the location of the button.
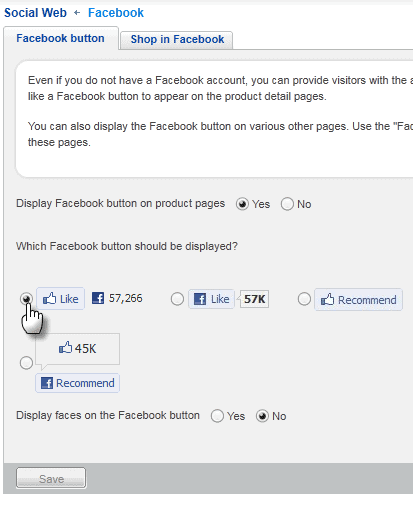
Once you have done this, your customers will immediately be able to "Like" products they find in your shop and thus be able to recommend them to their friends on Facebook. In your shop, you will also be able to see how often an offer has been recommended. If you have activated the "Display faces on the Facebook button" function, your customers will see the Facebook profile pictures of friends who have clicked on the button.
The Facebook shop
You can activate your Facebook shop on the second tab. Once you have done this, either the products from the homepage or your special offers will be shown on the shop page of the Facebook fan page of your shop.
At this stage, it might be useful to note the difference between a Facebook profile and a Facebook fan page.
Facebook profiles are intended for real people, whereas a fan page is an information page about a company, an organisation or simply a brand. The advantage of a fan page is that more than one "real" Facebook profile can be specified as an administrator and these people can then post in the name of the fan page.
You will need both for your Facebook shop: your own Facebook profile and a fan page for your company. If you still do not have your own profile you can create one here. If you already have one, log into Facebook before proceeding.
As already mentioned, you will also require a fan page for your company in addition to your personal profile. If you still do not have one, you can create one here. You must be logged in with your personal Facebook profile in order to create a fan page.
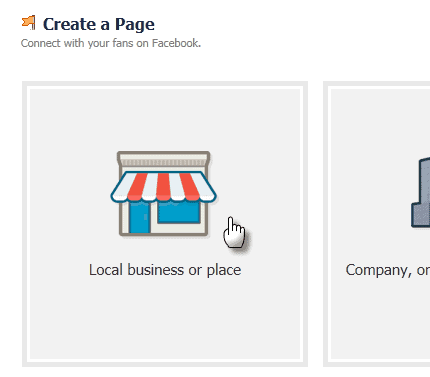
To do this, you simply enter your company data. We recommend selecting either the "Local business workplace" or "Company" categories for your online shop. Select one, then enter your company information.
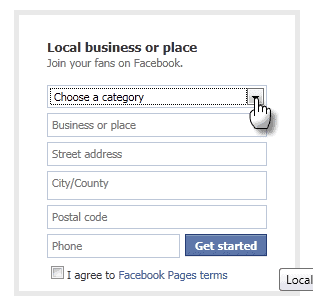
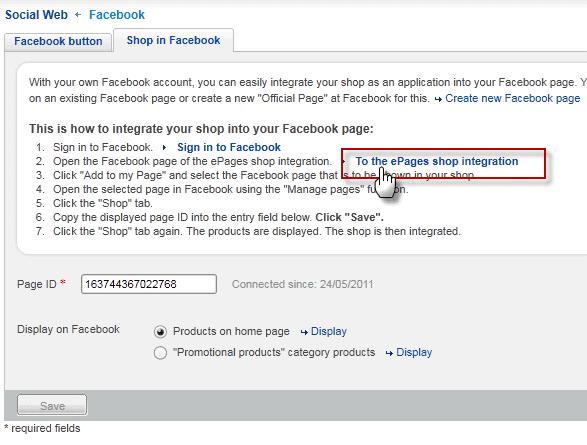
Click once more on "Get started" and you have created a fan page for which you are automatically the administrator. Now go back to the back office of your shop. In the "Social Web/Facebook" menu, you will find the link to the Facebook application "ePages-Shop-Integration". Click on the link and your browser switches back to Facebook.
You are now located on the info page of the ePages Facebook integration. On the left-hand side, you will see a button which says "Add to my page".
Click there. A new window will open – here you can select to which fan pages the shop shall be added. Click on the "Add to page" for the corresponding entry.
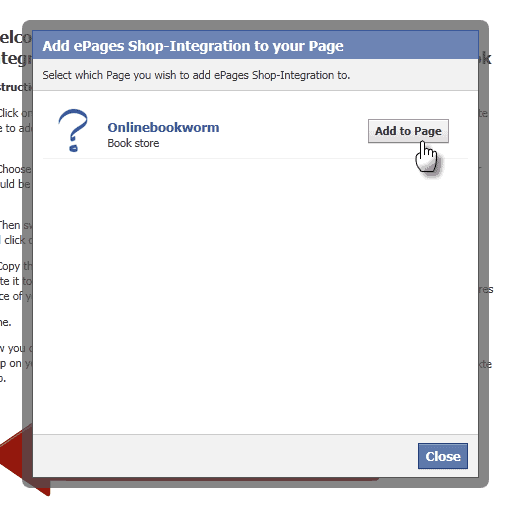
You have now added the "Facebook shop" to your fan page. At this point, all that’s missing are the products you want to display there. In order for this to be possible, you need to link the Facebook shop with your ePages shop so that the data can be exchanged.
To do this, you will need to: Go to the fan page of your shop. In the left menu below the logo, you will now see a new entry with the "Shop" description.
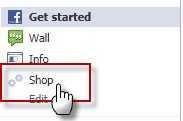
Click there and your still-empty Facebook shop will be displayed. Instead of finding products there, you will see a field with an identification number. Copy down this number and enter it in the back office of your shop.
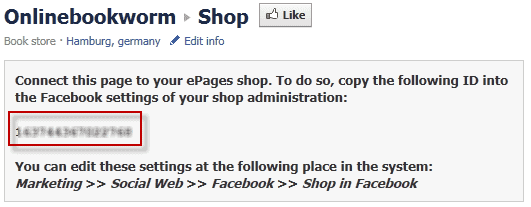
Please note: There are sometimes delays with the display of the ID – if you do not immediately see an identification number, look again after a little while.
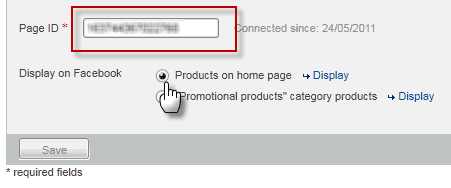
To do this, switch back to the back office of your shop. Enter the "Social Web/Facebook" menu and select the "Facebook shop" tab. You will find an input field here with the "Page ID" description – enter the identification number here. Now decide which products from the homepage or products from the "Special offers" category are to be displayed on Facebook and then click "Save".

That’s it. The products you have selected will be automatically displayed on your fan page. Customers & fans can then place the products in their shopping basket (at which point they will be automatically redirected to your online shop to complete the payment process). For technical reasons, the payment process must be carried out there in your online shop.
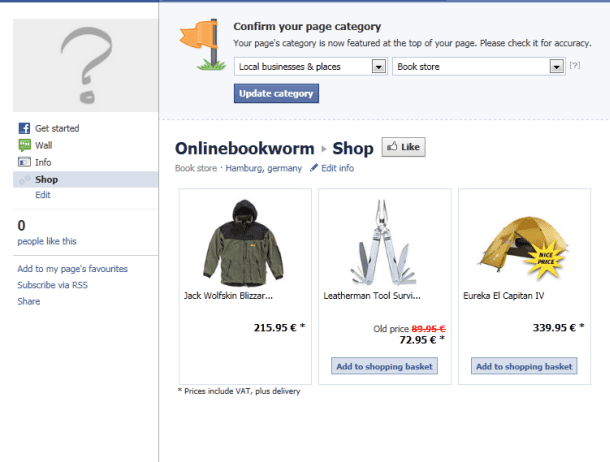
If you would like the shop to be displayed automatically when someone calls up your fan page, you can set this using the menu on the left side of your fan page. To do this, click on the "Edit" menu item (which is only shown to administrators of the fan page). This item also allows you to make other Facebook users additional administrators.
Volker Schwarz
Volker Schwarz studied German, History and Politics at the Ruhr-Universität Bochum. From 2004 to 2009 he worked as a freelancer for several marketing and communications companies in Hamburg, including e-commerce companies. Between August 2009 and December 2011, he worked as an online editor at ePages.



Leave a Reply
Want to join the discussion?Feel free to contribute!