Editorial Pages in The Online Shop
 In addition to pages for categories and products, you can also create editorial pages and integrate these into your online shop navigation. You can use these pages to integrate customer feedback, references, information about yourcompany or even job offers as you would using a classical website.
Creating Editorial Pages
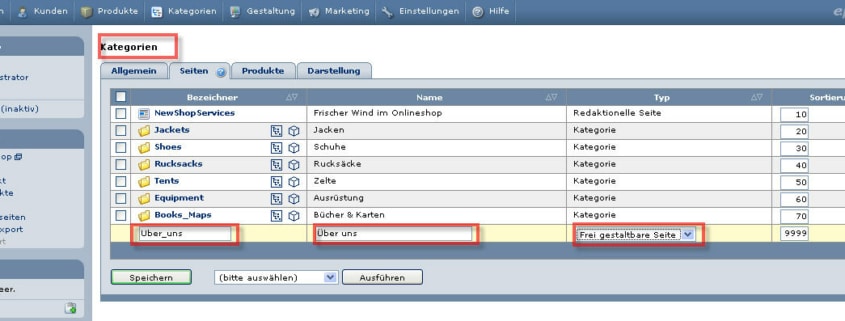
You create new navigation pages for your online shop in the shop administration under Categories ->Pages (ePages 5)/ Content/ Categories -> Datasheet view -> Pages (ePages 6) . Insert a new element here and select Freely-designable pages (ePages 5)/ Content pages (ePages 5/ 6) as the pagetype.

Freely-designable pages, in contrast to categories, do not contain products. They appear in the central view of your shop if they are set visible. They are not automatically displayed in the main navigation.
After you have created a new page element, click on its ID (ePages 5)/ Name (ePages 6) and start working on it. Via the edit text button, you can get to the so-called Rich Text Editor which you can use to create the content of your pages without HTML. If your pages will contain subpages, you need to create these as described above and link them to the parent pages at this location. If you have good knowledge of HTML, you can graphically adjust the navigation points that have been created in this way.
If you would like to link the page flexibly, it should generally be switched to "hidden".
Integrating Free Pages in Navigation Bars
After editing of the page, briefly switch to visible and click on the view in the shop. Here, you copy the part of the page address which follows after the questionmark. It should look something like this: ?ObjectPath=/Shops/epages26/Categories/News. To link a free page in one of the navigation bars, create a new navigation element for the desired navigation bar under Design ->Styles (style that you have activated for your shop) ->Navigation (ePages 5)/ Design -> Advanced design (style that you have activated for your shop) (ePages 6).

(View in ePages 5)

(View in ePages 6)
In the menu of the navigation element, activate the option User-defined -> HTML or User-defined -> Link and click on add.
In ePages 5 now click on the link of your navigation element under Assigned navigation elements add the previously copied URL in the field Web Page or the HTML input field. After saving, your new page is visible in the corresponding navigation bar.
In ePages 6 you see a lightbox that appears directly after having added the element. Enter the URL here or choose the destination page of the link directly.
Lorem ipsum dolor sit amet, consetetur sadipscing elitr, sed diam nonumy eirmod tempor invidunt ut labore et dolore magna aliquyam erat, sed diam voluptua.


Leave a Reply
Want to join the discussion?Feel free to contribute!